

Today I’ll be talking about cloth napkins and why we should consider using them on a regular basis. I have three ways to make them for your family and friends.
I don’t know why I decided these were for me. They take some getting used to. It feels weird at first wiping your mouth and hands with them at home. At a restaurant it feels fancy, but at home it’s just weird. Once you get used to it, I think you will love them! I made my first sets for Christmas gifts last year. They were the self-binding napkins and turned out to be very nice. You can find the instructions I used to make these here. However, they were a little pricey to make and they were too thick for every day.
I googled cloth napkins and found a slew of information about them that I would like to share and see if I may pull you onto the “cloth napkin bandwagon”! Here is a list of interesting facts about them:
· They are better for the environment by creating less trash. Many trees and a lot of fresh water go into making paper ones.
· Cloth is more durable than paper and cloth will last for years!
· Once you get used to wiping your face and hands on cloth instead of paper, you will love how soft they are.
· I like making mine out of cotton and just throwing them in with my towels to wash. I wash them in hot water. No worries about germs.
· How many will you need? Some people use a fresh clean napkin at every meal. Others use the same one all day. Whichever you decide to do will determine how many you will need. A nice number might be 6 per person/week. Most people work or are gone part of the day so 2/day use on average. That gives you a couple of days to wash them.
· You can store them exactly where you stored the paper ones. They look nice in a pretty bowl or basket. Put them in a drawer if you prefer not to have them out.
· Finally, they are pretty and add that extra touch to your place settings on the table. They make a normal dinner feel a little more special. To add a special touch, here is a link on folding them several different ways.
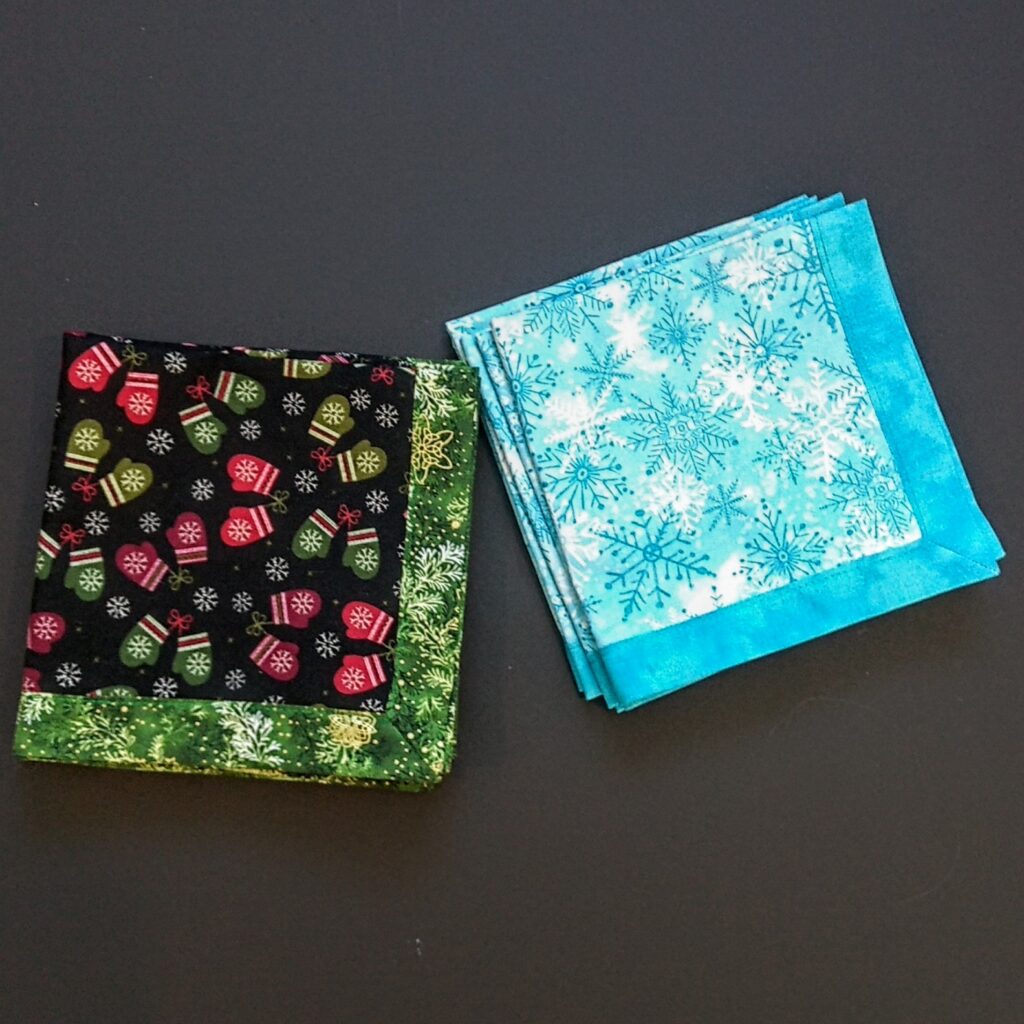
I have used cloth napkins for a couple weeks now and have found that the 16” ones might be too big for every day. I think I prefer the 12” size. This is something you will have to experiment with and see what size you like. A good idea might be to start small. Make a few sets for holidays or special occasions. Work slowly into using them every day. I really like the look and feel of the mitered corner napkins, but they do take longer to make. Let’s start with the easiest ones first. They are perfect for beginners and work up fast. They are double sided so you can use two different fabrics. Great if you are using your scraps!
1. Place two squares, right sides together, sewing around them a quarter inch, leaving an opening on one side, large enough to turn them right side out. Notice I cut the corners off and that helps make a sharper point when pushing out the corners.
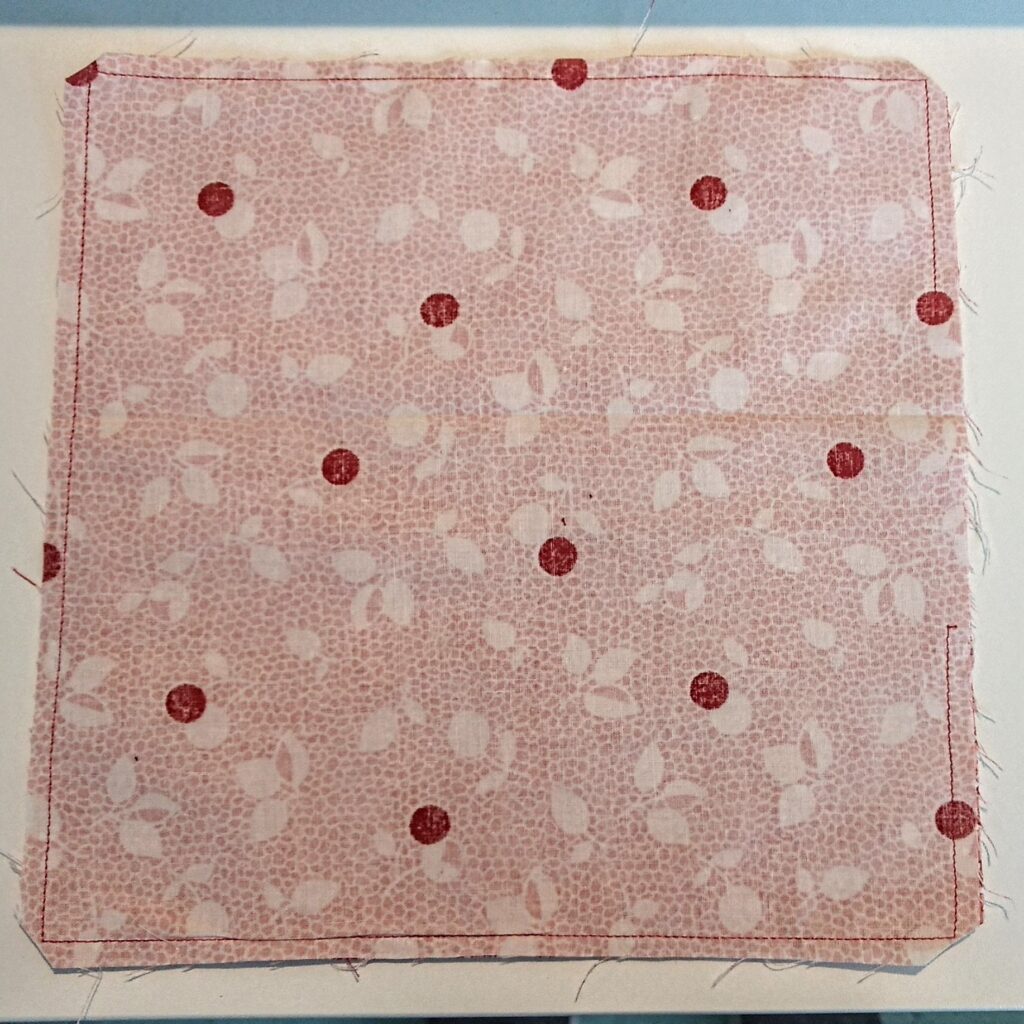
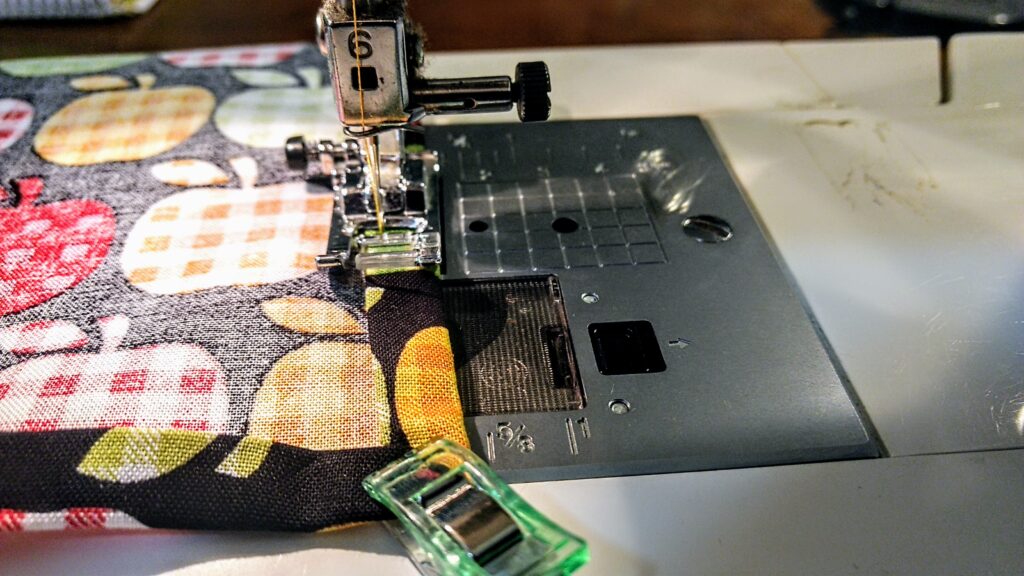
2. Press and then sew a finished seam around the outside edge, closing your opening, in the process.

The mitered corner napkins really have more ironing than sewing! The prep work before sewing is what takes so long.
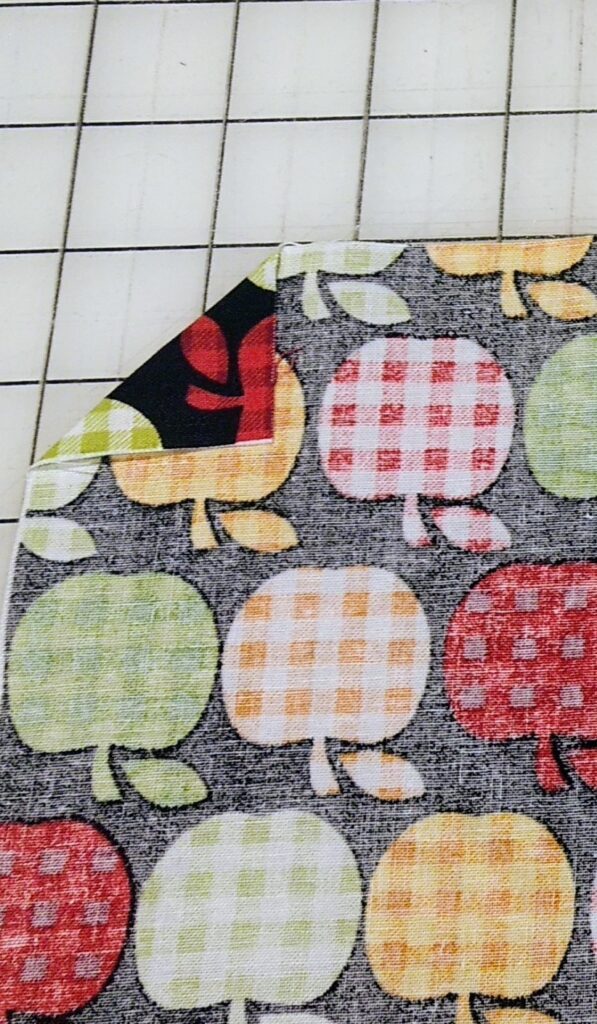
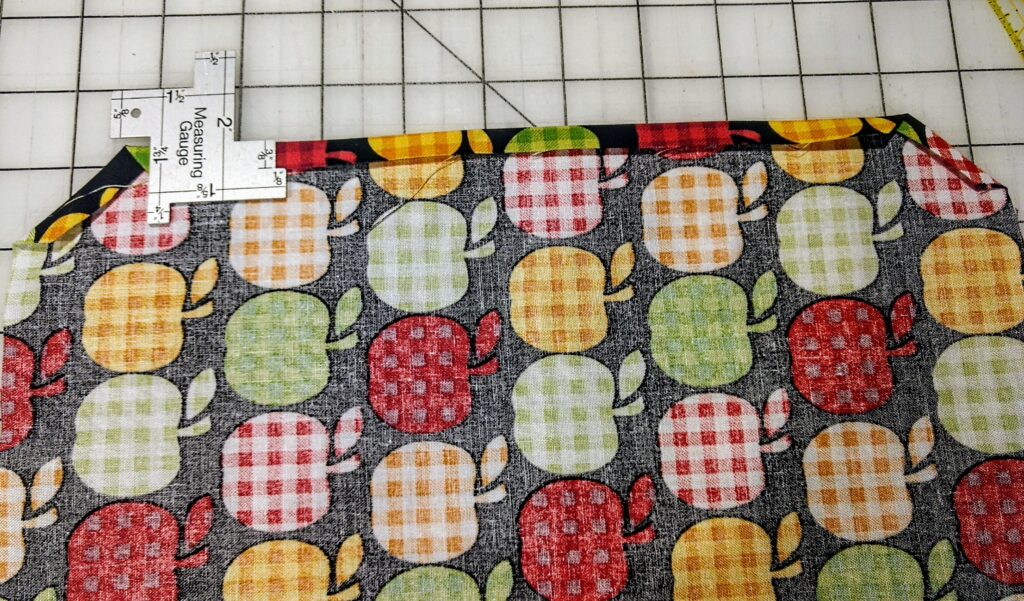
- Fold each corner down 1 ½”. I use my cutting board to do this because it has a 1” grid. Then press.
- Place the napkin back on the cutting board and open out the corner. Cut a 1” triangle by measuring diagonally. See photo.
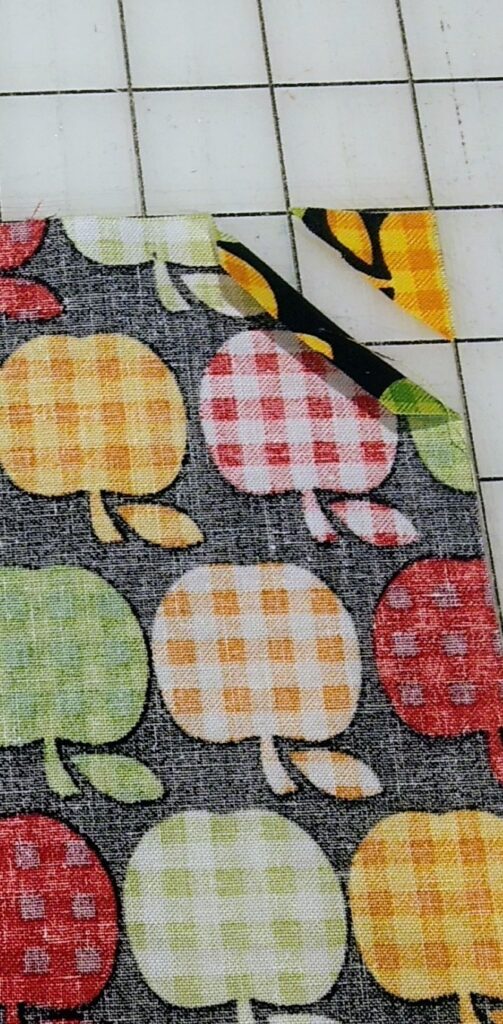
3. Follow around ironing down 3/8”.
4. Fold over again starting in the corner so you can match and make the miter. Iron it down all the way around again and use clips to hold corners.
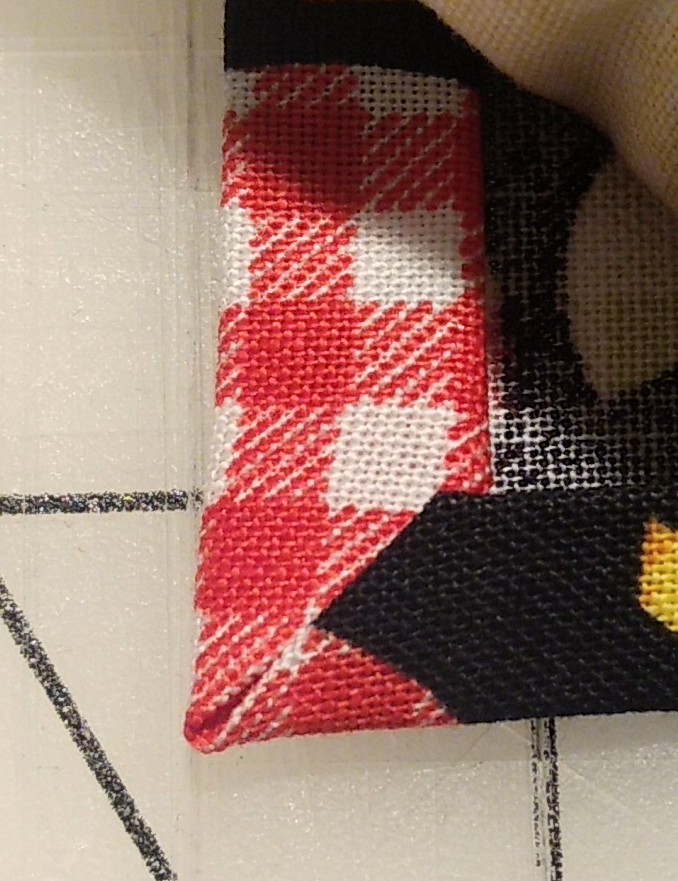
5. Sew on the wrong side so you can catch both sides of the mitered corners. Sew all the way around and stay close to the inside of the fold.
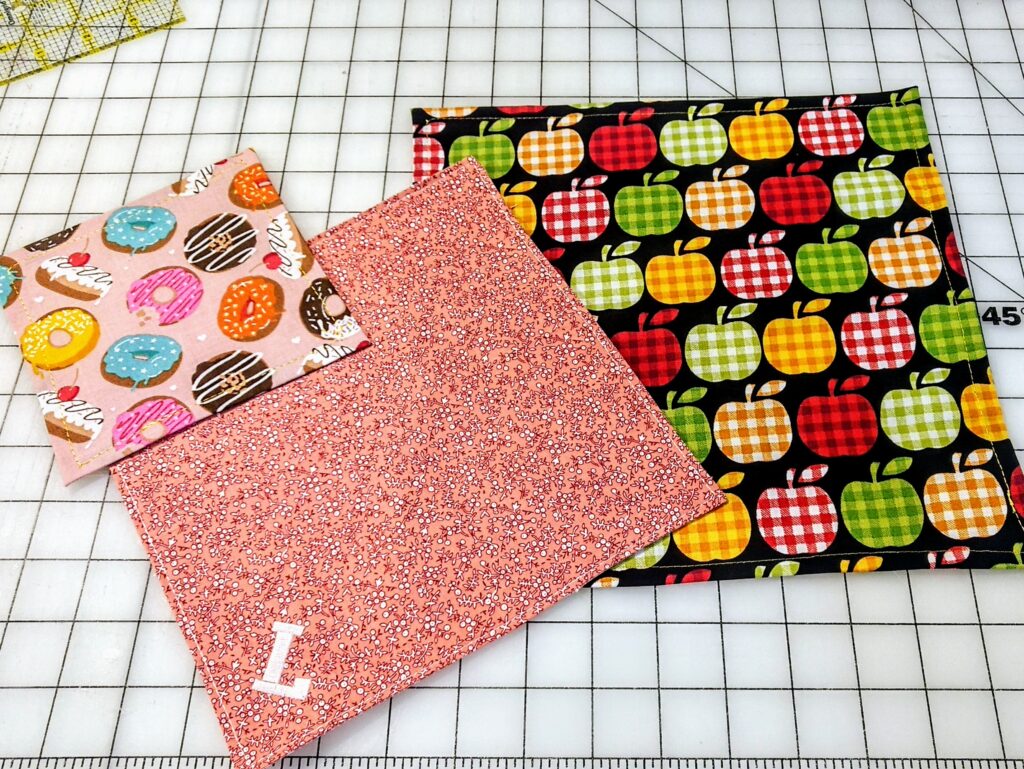
None of the napkins I made were from my scraps because I wanted matching sets. The red ones are from fabric I already had in my stash, and I intended to just pull from my stash. However, I saw the apple fabric and donut fabric and couldn’t resist! I’m using the donut fabric for small “cocktail” size napkins to use with coffee and dessert.
Let me know if you are going to give the cloth napkins a try. Have a great week, and Always Find Time to Sew,