
Here we are on the third string block. Today I’m showing you how to make the string quilt block with a path! Click on the links and they will take you back to, String Blocks: Let’s Quilt Together and Easy Covered String Block Tutorial. These were the blocks we learned how to make in January and February on the blog! Make sure you go back to these to get more information.
I’m excited about this string block because I have made two quilts from it! It is a great scrap buster. My first one is very scrappy with muslin squares as my foundation. It doesn’t matter what fabric strips you sew on the block because your eyes head for the muslin path.
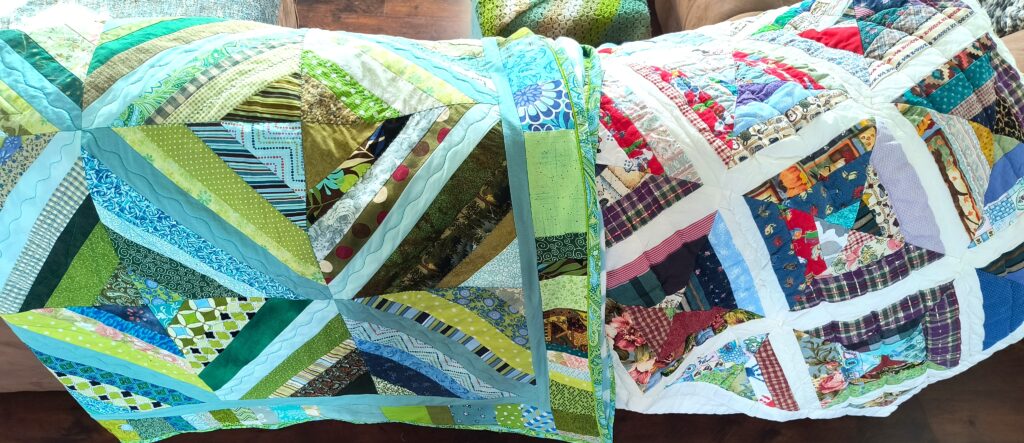
The second one I chose to make was all about teal…my favorite color! I chose a teal cotton foundation fabric and only sewed blue, green, and teal fabric strips to it. Again your eyes go to the teal path!
Just some general information about these quilts. Strings are strips of fabric generally 1 1/4″ – 3″ wide, but that’s only a suggested width! Use what you like. They can all be the same width or different widths. Mine are generally different widths because I’m wanting to use up my scraps. Start with some type of foundation square. For this quilt, choose whatever color you want the path to be. Solids work best if you want the path to stand out. Remember the larger the square, the larger in length your strings have to be. If you’re using scraps, then you might be limited on lengths of strings. The string must be longer on each end than the foundation block.
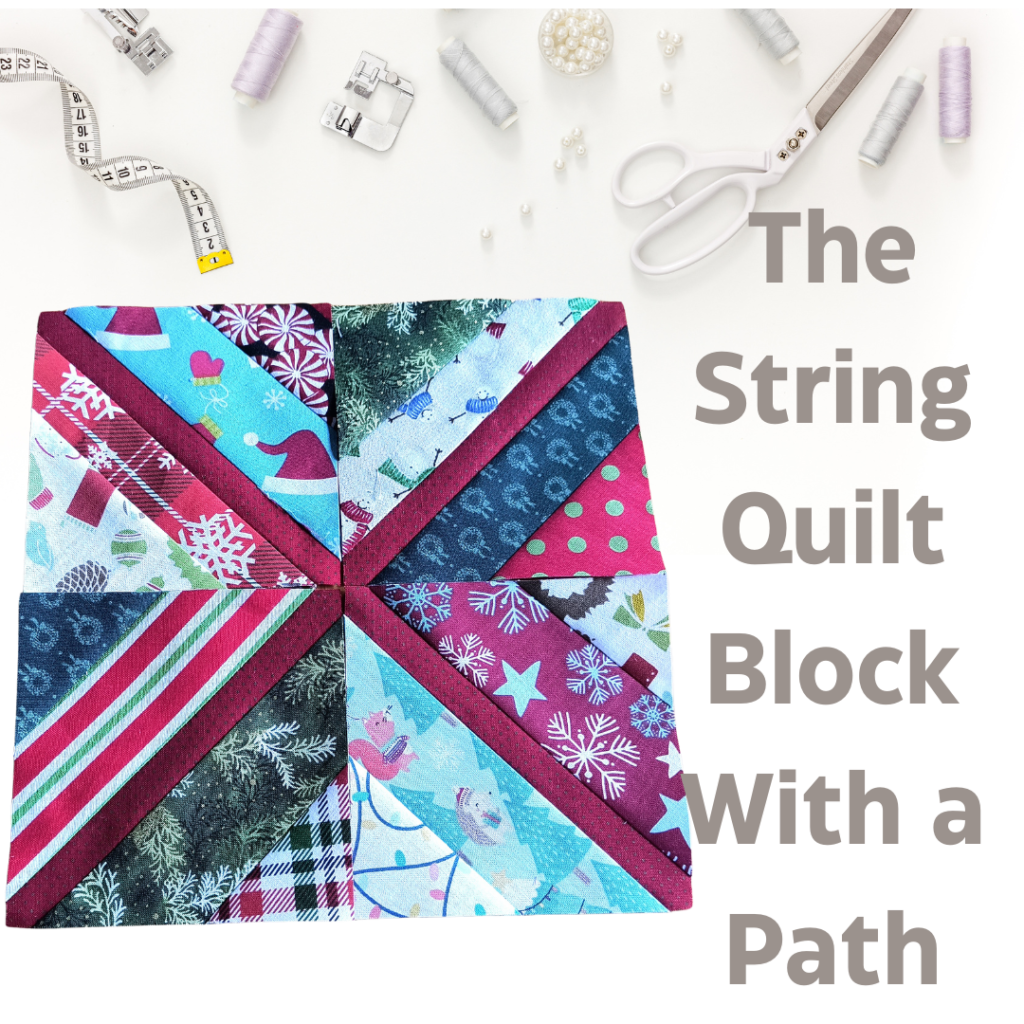
Let’s Make a String Quilt Block With a Path
I’ve decided to create a small block. I’m using a 4 1/2″ red foundation block and I want to use my Christmas fabrics, reds, and greens.
After you cut out the foundation blocks, you will need to decide how wide you want the center path down your block to be. It runs from corner to corner. I decided on a 1/2″ wide because my blocks are so small. I used 1 1/2″ on my larger blocks, but it’s up to you! My half inch ruler that centers on the corners works perfectly and I can easily draw a line down each side of it on the wrong side of the fabric.
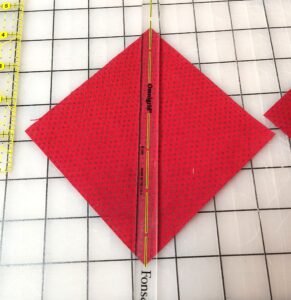
Take a piece of poster board or something like that to create a template, the exact width you want, so you don’t have to measure with a ruler every time. My ruler just happens to be the width I need.
To start the block, place a string right side up and the block right side down. You should be able to see the line you drew. Place the block so the string is about a quarter inch past the line.
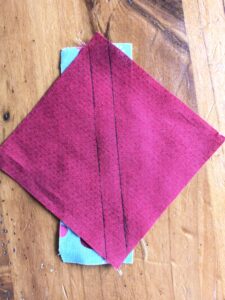
Sew down the line on the right side only according to the picture. Turn the block over and press the string to the right.

The first block on the left shows the string sewn to the block, but not pressed over, while the block in the middle shows the string pressed over. Finally, the last block shows how to add another string, RST (right sides together) sew down a quarter inch and press open. Remember, strings must go past the foundation block at each end. Continue laying strings to the last string you sewed until you have the block covered. When starting the left side of the block, follow the same instructions, but you will be sewing on the left drawn line.
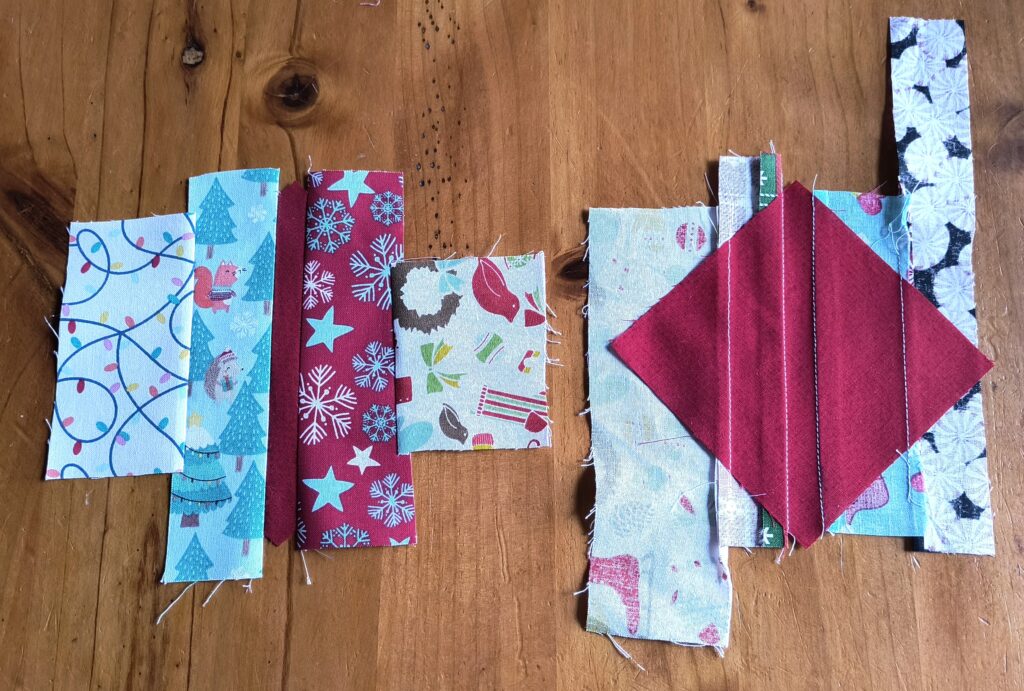
The left block shows what the front of the block looks like and the right block shows what the back looks like. With your block turned over to the back, the red foundation block is your guide. Cut off the excess strings all the way around.
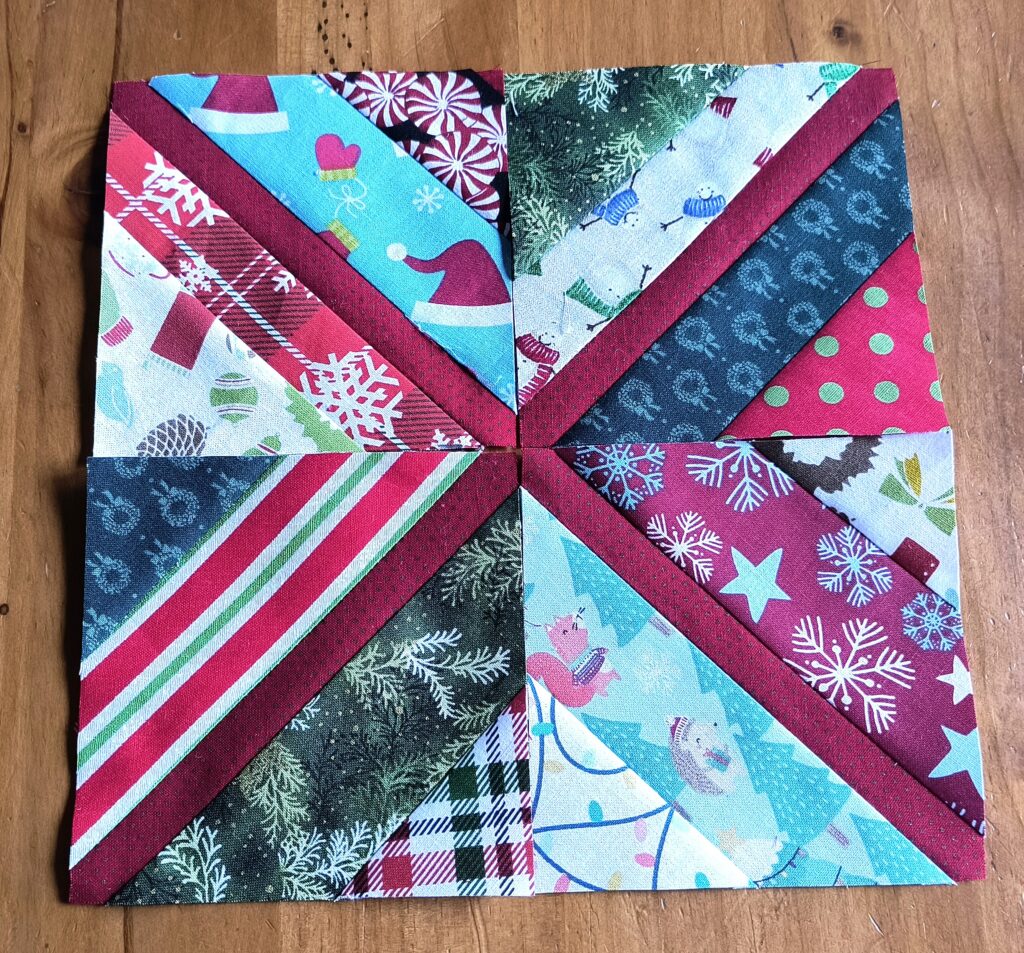
Here I placed four blocks together to form a larger block. There is the red path that forms and X. Where do your eyes go? I hope you enjoyed this tutorial. Let me know if you have any questions and if you will try one of these blocks. I plan to place mine together to make a tablecloth!
Let’s keep the conversation going and share your pictures of the string blocks and quilts over in the private Facebook Group, Quilting Friends of Jerianns Handmade. It’s easy to join!
Always find time to sew,